画像描画
この章では(DirectWrite・Direct2D等を使った)画像をテクスチャとして画面に描画する方法について解説します。
このページの内容は、2D描画時の初期設定まで終わっていることが前提です。
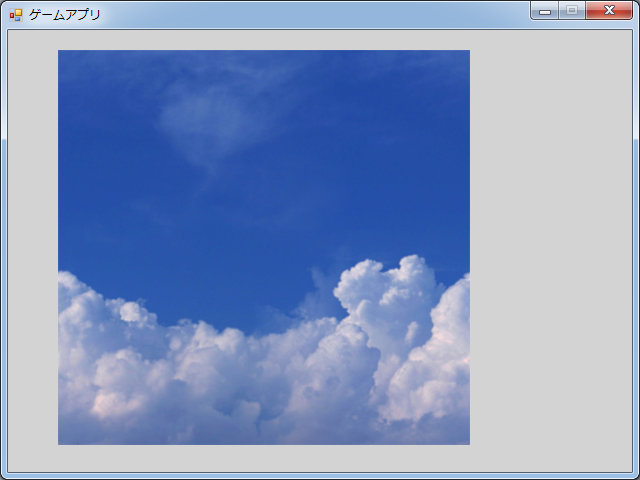
実行結果
画像の読み込み
ファイルの用意
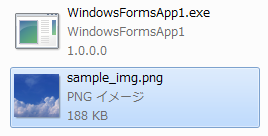
- 今回は下記の画像を読み込みます。

- 画像ファイルは実行exeと同じディレクトリに配置しておいてください。
ファイルの読み込み処理
- 画像描画に必要なファイルを関連付けます。
using System.Drawing.Imaging;
using System.Runtime.InteropServices;
- 画像を読み込む関数を作ります。
仕組みとしては一旦 Bitmap形式で読み込んだものを1byteずつSharpDX用のBitmapへ書き出していきます。// BitmapからDirectX用のBitmapを生成する private static SharpDX.Direct2D1.Bitmap LoadFromFile(RenderTarget renderTarget, string file) { // System.Drawing.Imageを使ってファイルから画像を読み込む using (var bitmap = (System.Drawing.Bitmap)System.Drawing.Image.FromFile(file)) { // BGRA から RGBA 形式へ変換する // 1行のデータサイズを算出 int stride = bitmap.Width * sizeof(int); using (var tempStream = new DataStream(bitmap.Height * stride, true, true)) { // 読み込み元のBitmapをロックする var sourceArea = new System.Drawing.Rectangle(0, 0, bitmap.Width, bitmap.Height); var bitmapData = bitmap.LockBits(sourceArea, ImageLockMode.ReadOnly, System.Drawing.Imaging.PixelFormat.Format32bppPArgb); // 変換処理 for (int y = 0; y < bitmap.Height; y++) { int offset = bitmapData.Stride * y; for (int x = 0; x < bitmap.Width; x++) { // 1byteずつデータを読み込む byte B = Marshal.ReadByte(bitmapData.Scan0, offset++); byte G = Marshal.ReadByte(bitmapData.Scan0, offset++); byte R = Marshal.ReadByte(bitmapData.Scan0, offset++); byte A = Marshal.ReadByte(bitmapData.Scan0, offset++); int rgba = R | (G << 8) | (B << 16) | (A << 24); tempStream.Write(rgba); } } // 読み込み元のBitmapのロックを解除する bitmap.UnlockBits(bitmapData); tempStream.Position = 0; // 変換したデータからBitmapを生成して返す var size = new Size2(bitmap.Width, bitmap.Height); var bitmapProperties = new BitmapProperties(new SharpDX.Direct2D1.PixelFormat(Format.R8G8B8A8_UNorm, SharpDX.Direct2D1.AlphaMode.Premultiplied)); return new SharpDX.Direct2D1.Bitmap(renderTarget, size, tempStream, stride, bitmapProperties); } } } - 先ほどの関数を使い画像を読み込みます。
// 画像を読み込む
if (_RenderTarget2D != null)
{
    _Bitmap = LoadFromFile(_RenderTarget2D, "sample_img.png");
}
画像の描画
- 2D描画を開始します。
_RenderTarget2D?.BeginDraw();
- 画面を初期化します。
通常は白や黒で初期化することが多いですが、今回は初期化されたことが分かり易く伝わるように敢えて灰色で初期化しています。// 画面を特定の色(例.灰色)で初期化 _RenderTarget2D?.Clear(SharpDX.Color.LightGray);
- 2D描画で図形を描画します。
必ずBeginDraw()とEndDraw()の間で処理を行ってください。// 画像描画 if (_RenderTarget2D != null) { // 位置 var pos = new Vector2(50.0f, 20.0f); // サイズ var size = _Bitmap?.Size ?? new Size2F(); // 画像描画 _RenderTarget2D.DrawBitmap(_Bitmap, new SharpDX.Mathematics.Interop.RawRectangleF(pos.X, pos.Y, pos.X + size.Width, pos.Y + size.Height), 1.0f, BitmapInterpolationMode.Linear); } - 2D描画を終了します。
_RenderTarget2D?.EndDraw();
_SwapChain.Present(0, PresentFlags.None);
コード
Program.cs
GameForm.cs